The new MELAtherm 20 in XXL: Discover now >

|
    • Unbenannt-1Best Sellers
    • Autoclave Tile
      • premium-klassePremium Class
      • Prime LinePrime Line (Class B)
      • Pro Line Product picturePro Line (Class B)
      • MicrosoftTeams-image (1196)-minPro Line (Class S)
      • 150 2Vacuclave 105 / 305
      • Vacuclave 550 Menu ElementVacuclave 550
      • Grossautoklaven-SystemloesungCliniclave 45 Series
      • 24-BL-StoererVacuklav 24 BL+
      • MELAtronic ProduktfotoMELAtronic Series
      • Zubehör Careclave ProduktfotoAccessories & components for autoclaves
    • Grossautoklaven-Systemloesung
      • Cliniclave 45 Produktfoto für Kaegorie MenuCliniclave 45
      • Cliniclave 45 M ProduktfotoCliniclave 45 M
      • Cliniclave 45 D ProduktfotoCliniclave 45 D
      • Cliniclave 45 MD ProduktfotoCliniclave 45 MD
      • Vacuclave 550 Menu ElementVacuclave 550
      • Großautoklaven Zubehör ProduktfotoAccessories & components for large autoclaves
    • 150 2
      • 150-ohne 1Vacuclave 105
      • 350-ohne 1Vacuclave 305
      • MELAquick ProduktfotoMELAquick Series
      • MELAtronic ProduktfotoMELAtronic Series
    • mt20-gross
      • mt20-grossMELAtherm 20
      • MT10EVO_Produkt_geschlossenMELAtherm 10 Evolution
      • Körbe und Adapter ProduktfotoLoading patterns
      • Collage-Korb 3-minBaskets & Adapters
      • teaser-washcheckMELAcontrol Wash Check
      • Regenerating SaltRegenerating Salt
      • MELAtherm Zubehör MenuAccessories & components for thermal disinfectors
    • Careclave_Produkt_offen für Menü
      • Careclave_Produkt_offen für MenüCareclave
      • Menu Foto Carebox BlueCarebox Blue
      • Carebox Green Menu BildCarebox Green
      • Cooling Box ProduktfotoCooling Box
      • Care Oil ProduktfotoCare Oil
      • Zubehör Careclave ProduktfotoAccessories & components for Careclave
    • MicrosoftTeams-image (1170)-min
      • MicrosoftTeams-image (1420)-min(1)MELAseal 300
      • MELAseal 200 Menu FotoMELAseal 200
      • MELAseal 100 Bild MenuMELAseal 100+
      • Ink test seal check 1Routine Testing
      • Siegelnahtfestigkeit MaschineSeal Seam Stability Test
      • Zubehör MELAseal MenuAccessories & components for sealing devices
    • MicrosoftTeams-image (1169)-min
      • Trays neuMELAstore Trays
      • OTS MenüMELAstore Tray Ophthalmology
      • MELAstoreMELAstore Boxes
      • SterilisierbehälterSterilization Containers
      • me01100 1MELAstore transport box
      • Zubehör PackagingAccessories & components for sterile goods storage
    • documentation
      • MELAtrace-Pro Menu IconMELAtrace
      • MELAverse Produkt KachelMELAverse
      • MELAprint 80MELAprint 80
      • MELAprint 60 ProduktfotoMELAprint 60
      • MELAdoc Titelbild-blau MELAdoc
      • MELAflash ProduktfotoMELAflash
      • MELAnetBox Menu BildMELAnet Box
      • Zubehör DokuAccessories & components for documentation
    • MELAverse Produkt KachelMELAverse
    • MicrosoftTeams-image (1171)
      • MicrosoftTeams-image (1052)Care Oil Spray
      • MicrosoftTeams-image (1053)Chamber Protect
    • MicrosoftTeams-image (1172)-min
      • MELAdem 40 ProduktfotoMELAdem 40
      • MELAdem 47 ProduktfotoMELAdem 47
      • MELAdem 53 Menu FotoMELAdem 53
      • MELAdem 53 CMELAdem 53 C
      • MELAdem 56 ProduktfotoMELAdem 56
      • MELAjet ProduktfotoMELAjet
      • MELAtest 60 ProduktfotoMELAtest 60
      • Zubehör WasserAccessories & components for water treatment
    • Ink test seal check 1
      • teaser-washcheckMELAcontrol Wash Check
      • MELAcontrol Seal Check Routine Prüfung MenuMELAcontrol Seal Check
      • Siegelnahtfestigkeit MaschineSeal Seam Stability Test
      • Menu ink TestMELAcontrol Ink Test
    • melacare pouch sealcheck resinConsumables
    • Downloadcenter Tile ImageDownloadcenter
    • Service-troubleshootingTroubleshooting
    • Video Tutorials Autoclave
      • Careclave Tutorial MenuCareclave Tutorials
      • Autoklaven Tutorial Autoclaves Tutorials
      • Tutorial Thermodesinfektor MenuWasher-Disinfector Tutorials
      • Siegelgeräte Menu TutorialMELAseal 200 Tutorials
      • MS300 BalkenteaserMELAseal 300 Tutorials
      • MELAtrace TutorialMELAtrace Tutorials
    • Gerätertegistrierung Menu BildDevice Registration
    • Techniker-schulung Menü BildTechnical Training
    • KonfiguratorConfigurator
    • save money Promotions
    • Entdecken-referenzSuccess Stories
    • Hygiene Hub TileInspiration & Tips
    • Tutorials TileNews
    • MELAG FamilieFamily Business & Jobs
    • Beratung-uebersicht
      • Beratung-uebersichtBook a consultation: On-site, online or in a showroom
      • entdecken-ansprechpartnerYour sales contacts
      • Messen & Kongresse Bild MenuFairs & Congresses
      • beratung-kontaktformularContact form
      • Gebauer GFCompany & Apprenticeship
    • entdecken-ansprechpartner
      • Beratung-uebersichtBook a consultation: On-site, online or in a showroom
      • entdecken-ansprechpartnerYour sales contacts
      • Messen & Kongresse Bild MenuFairs & Congresses
      • beratung-kontaktformularContact form
      • Gebauer GFCompany & Apprenticeship
    • Messen & Kongresse Bild MenuFairs & Congresses
    • beratung-kontaktformularContact form
    • Gebauer GFCompany & Apprenticeship
    • Dental
    • Medical
    • Ophthalmo
    • Hospital
    • Veterinary
    • Podiatry
Select language and country

Newsletter Subscription

Register for our newsletter and always stay up to date.

Products
  • Instrument Reprocessing
  • Autoclaves
  • Large Autoclaves
  • Washer-Disinfectors
  • MELAcare
  • Careclave
  • Sealing Devices
Service
  • Downloads
  • Troubleshooting
  • Video Tutorials
  • Blog
Company
  • We are MELAG
  • Sustainability
  • History
  • News
  • Contact
  • Instrument Reprocessing
  • Autoclaves
  • Large Autoclaves
  • Washer-Disinfectors
  • MELAcare
  • Careclave
  • Sealing Devices
  • Downloads
  • Troubleshooting
  • Video Tutorials
  • Blog
  • We are MELAG
  • Sustainability
  • History
  • News
  • Contact
  • Imprint
  • Terms and Conditions
  • Privacy
  • Whistleblower
  • Open Cookie Settings

© MELAG Medizintechnik GmbH & Co. KG

Placeholder for alt text

Autoclave loading pattern: How to load the autoclave correctly

The correct loading of an autoclave is crucial to ensure effective sterilisation.

Discover Autoclaves

Enable YouTube content

To play this video, please allow cookies and other external services from YouTube.

Enable YouTube content

To play this video, please allow cookies and other external services from YouTube.

Collage-Autoklaven-min

Struggling to choose the right autoclave?

With our product finder, you can find the right autoclave for your practice in a flash.

The autoclave product finder
@MELAG_Medizintechnik

Become part of the MELAG family on Instagram.

Therminator
LIKE A BOSS MELAConnect INSTA.00 00 21 17.Still002
James Blond
242659556 1078731822897268 6204022075826677963 n
melag_medizintechnik
Therminator
LIKE A BOSS MELAConnect INSTA.00 00 21 17.Still002
James Blond
242659556 1078731822897268 6204022075826677963 n
La Casa
164138715 3507874006103570 311456217807659774 n
149845491 437586424027695 5214298580294819893 n
83934906 143956850408991 6347510830148386435 n
Therminator

2789 views

The MELAG THERMINATOR: As powerful as Schwarzenegger in his prime! 🤖 The innovation from the future against viruses and germs.

Subscribe now
La Casa
164138715 3507874006103570 311456217807659774 n
149845491 437586424027695 5214298580294819893 n
83934906 143956850408991 6347510830148386435 n

Optimised loading patterns for different applications

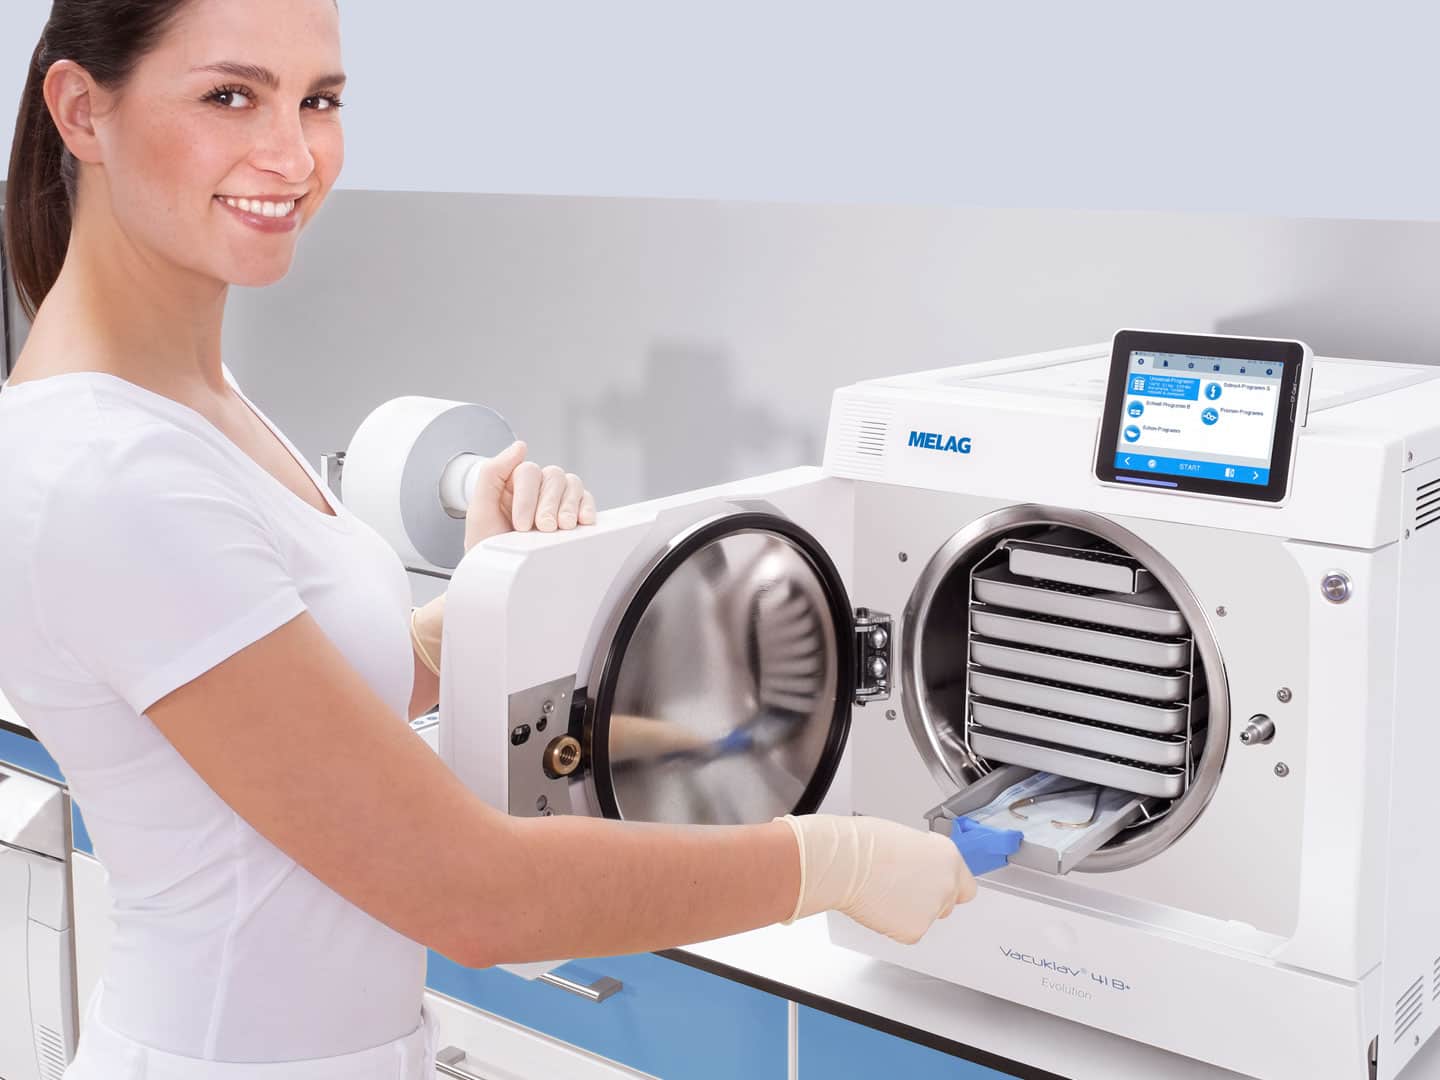
The correct loading of your autoclave is crucial for safe and efficient sterilisation. An incorrect arrangement can impair the steam circulation and worsen the drying results. To ensure that your instruments are optimally reprocessed, you should observe the following points:

Wrapped instruments: The correct position is crucial

Ideally, sterilisation packaging made of film and paper should be positioned vertically in a holder - with paper against paper and film against film. If this is not possible, place the packaging flat on the tray with the paper side down, overlapping by a maximum of one third. Make sure that the sealed seam does not open - this could indicate that the packaging is too small.

Unwrapped instruments: make room for the steam

Unpackaged instruments should lie loosely on the trays without touching each other so that the steam can flow around them completely. Larger instruments or those with cavities should be placed in such a way that the condensate can drain away unhindered.

The correct sequence: think from top to bottom

There is a clear rule for loading the autoclave:

  • Top: Textiles and light packaging made of paper and transparent film

  • Centre: Wrapped instruments

  • Bottom: Unwrapped instruments and heavy loads such as sterilisation containers and containers

This arrangement ensures optimum steam distribution and prevents uneven drying.

Why is it so important to load the autoclave correctly?

The correct loading of an autoclave is crucial for safe and efficient sterilisation. Incorrect loading patterns can impair steam penetration, make drying more difficult and, in the worst case, jeopardise patient safety. But how do you load an autoclave optimally?

In this article, you will learn what is important when loading MELAG autoclaves, which typical errors should be avoided and which best practices ensure reliable sterilisation. Always follow the manufacturer's instructions in the operating manual, as only a correctly loaded sterilisation chamber guarantees perfect results. Let's work together to eliminate the most common stumbling blocks and ensure maximum hygiene in your practice or clinic.

The basic rules for loading the autoclave correctly

  1. Avoid overloading: Overloading hinders the circulation of steam. Ensure that there is sufficient space between the instruments and adhere to the maximum weight specified in the user manual for wrapped and unwrapped instruments and textiles.

  2. Position test specimens correctly: Check the sterilisation conditions regularly using Helix test specimens or type 5 indicators. Place the test specimens exactly according to the reference load in the validation report.

  3. Use perforated aluminium trays: These promote condensate drainage and improve drying. Avoid paper tray inserts, as they can lead to poor drying results in modern autoclaves.

  4. Position sterilisation containers optimally: Use stacking feet to place containers on top of each other without a holder. This leaves sufficient space for steam to enter and effective sterilisation.

Discover our autoclave product portfolio >

Conclusion: Loading an autoclave correctly

Loading your autoclave correctly is the key to safe and efficient instrument reprocessing. By following the above guidelines, you will not only improve sterilisation quality, but also protect your patients.

Would you like to learn more about optimal loading patterns? Contact us for a personalised consultation >